Watch this week's video on YouTube
This week, I filmed my experience as a first time speaker at PASS Summit in Seattle. No blog post, just a video to relive the experience.
Watch this week's video on YouTube
This week, I filmed my experience as a first time speaker at PASS Summit in Seattle. No blog post, just a video to relive the experience.
Watch this week's video on YouTube
Today I want to share my process for blogging and making weekly YouTube videos.
I've been hesitant to write this post because of how much I am still refining the process. Since I started making videos two years ago, not a few weeks go by without trying something new. I frequently try to improve my video and audio quality, learn new teaching strategies, and automate parts of the editing process.
So while I am excited to share what goes into making one of my videos, please be aware that it is still a work in progress.
When I started blogging and making videos, thinking of topics to write about was difficult.
Then I started keeping a OneNote notebook to build up a list of ideas. Whenever I learned how to solve a problem or helped someone else solve a problem, I would write that idea down.
I also began outlining presentations I wanted to give and added a blog/video idea for each demo that I knew I wanted to include in my presentation. Not only did this help spread out the work required for creating a new presentation, but it gave me a lot of material to create for my blog and YouTube channel.
Today I have what feels like an endless list of topic ideas to write about. Every Monday and Tuesday I browse my list and choose what I think would be a good topic to use for the upcoming week's post/video. I take into consideration whether I discovered something particularly surprising recently, whether I need to create some demos for an upcoming presentation, and how busy my upcoming week is with other events.
The goal is that by Tuesday night I know what topic I'll want to work on during the upcoming week.
On Wednesday and Thursday I write my demos.
Some weeks this is easy: often when I add a topic to my idea notebook, I include code that either partially or fully meets my demo needs.
Other weeks this step is more involved. This happens in particular when I need to pin down why a certain behavior is occurring. Maybe I discovered an interesting SQL Server behavior during my workday but didn't have time to dig into why it was happening. I might have found a quick fix to get me through the problem at work, but I want to do a little bit more research to get to the root cause for my post/video.
This is often my favorite part of the process, although sometimes it can also be the most frustrating. There have definitely been weeks where I start out with one idea in mind, but after struggling to build a solid demo, I choose a different topic for that week and stash away the original idea to try again some time in the future.
I usually film my videos on Friday nights. Except when I film them on Saturday mornings.
Having a permanent studio setup in my basement has made this process much easier. Instead of needing to make sure my video background is clear of toys/general clutter, needing to set up lights and cameras, and asking for perfect silence from everyone in the house, I now have a space I can just sit down and record without any fuss.
I shoot my videos in one continuous take that later gets edited for content. I've listed the gear I use to shoot on at the bottom of this post, but to get a good feel for my setup check out this week's video starting at the 2:54 mark. I think it gives a cool example of how much lighting matters in these types of videos, as well as the benefits of post-production color grading.
Editing the raw video and audio recordings into a short and (hopefully) entertaining and educational video is where I have evolved my process the most.
Since I record everything in one long take, the first thing I do is sync up all of the various footage from cameras, screen captures, and audio recordings.
I then use Adobe Premiere's Multi-Camera editor to produce the rough cut of the video. This process is a lot like producing a live TV show - I use keyboard shortcuts to jump between video and audio tracks in real-time. By the time I finish watching the raw footage, I have a pretty good edit of the final video.
Once I have the initial edit done, I go back and start adding whatever additional overlays and screenshots I want to include. This part used to be a huge burden because Premiere requires 8-10 clicks just to get a screenshot added to the editing timeline.
Then I watched this 4-hour long video of a professional editor editing a YouTube video in real-time. The key takeaway was how much he is able to automate using AutoHotkey.
Inspired, I wrote my own AutoHotkey script to copy screen caps from SnagIt directly into Premiere with a single keyboard shortcut. This saves me a TON of time, not to mention makes the process of editing much more enjoyable.
Although all of this editing is time consuming, it's also fun. I create tightly edited videos like this because it's the type of video that I've always wished there was more of in the YouTube programming space. I figured if these are the kinds of videos that I want to watch, then hopefully other people will want to watch them too (and you have been, thank you!!!!)
By Sunday, my video is usually done and uploaded (but not shared) on YouTube.
Sometimes I write my blog post on Monday nights, sometimes it gets written earlier in the process. Writing the post usually goes quickly since all of work of creating demos and thinking of a logical structure has already been prepared for the video.
Once the post is written, I schedule the post and video to automatically publish the next day.
Tuesday morning the post and video go live at 7am and the whole process repeats itself later that evening.
Below is the list of gear I currently use. These are all tools I currently use to produce my online videos. Some of the links below are affiliate links to help fund my coffee consumption during those early morning editing sessions.
Epidemic Sound - Royalty free music and sound effects. Easy to search. I used to scour the internet for royalty free tracks, and while there are a lot out there, I got tired of searching through all of the junk to find the high quality recordings.
Adobe Creative Cloud - I've been using Photoshop and Premiere for decades. New versions of Premiere are generally buggy and terrible, so I usually wait a few months until a few updates come out after a release before installing a new version (and always install it side by side with the old version).
SnagIt - Lightweight screen capture software, both for stills and video. TechSmith also makes Camtasia which is a more full featured with its capturing and editing abilities.
Handbrake - I use this to convert my variable frame rate SnagIt screen recordings into constant frame rate videos that will sync nicely with my video footage in Premiere
Canon 80D DSLR - I bought this camera specifically for shooting video and it has proven to be a great value. Depending on where I am shooting, I will use the the 18-55mm kit lens, a Canon 10-18mm EFS lens (great for hand held selfie shots), or a Canon 50m f/1.4 EF lens (when set up in my studio).
Manfrotto Aluminum Tripod - Great solid tripod. I've owned several of these throughout the years and they perform great. I pair this with my favorite tripod head, the Manfrotto Joystick, which gives full 360-degree smooth adjustments.
JOBY GorillaPod - I love this little tripod when shooting handheld or when traveling because I don't have to bring full sized tripods with me (although, that means I'm usually moving tables and standing near objects that the GorillaPod can mount to).
RODE VideoMic - My go-to when I am recording within a few feet of the camera. Captures great audio, and the windscreen doubles as a dog-toy (not really...but dogs will try to eat it).
Tascam DR-05 - I use this when needing to capture 360-degree sound (typically when multiple people are talking on stage). In addition to using the built in microphones (which are decent), I also use it to record sound from an external microphone.
RODE Lavalier Microphone - A clip on mic. Essential when I'm standing far away from the camera or in noisy environments.
Studio backdrop and lights- This kit includes backdrops, stands, and lights. It's not high quality, but if you aren't afraid of modifying things to fit your needs this works really well as a starter pack. I replaced the included bulbs with 100W LED equivalents and rigged it up so that there were two lights in each softbox.
GVM LED Panel Light - My favorite light that's easy to take with me wherever I go. Lots of good light as long as you keep it within a few feet of you.
Mini Video Lights - Great for adding accent lights. I usually pair these with some colored gels to get nice background colors.
This past weekend I had a blast presenting Joker's Wild with Erin Stellato (blog\|twitter), Andy Mallon (blog\|twitter), and Drew Furgiuele (blog\|twitter).
Watch this week's video on YouTube
Table of contents:
While a video doesn't quite give you the same experience as being in the room with dozens of other data professionals laughing and shouting along, hopefully it gives you an idea.
Here's a behind-the-scenes peek at how it all came together.
I've wanted to do a "fun" SQL Server presentation for a while; something that would be lighthearted while still delivering (some) educational value.
I ran some ideas past Erin after SQL Saturday Cleveland earlier this year. We came up with several concepts ideas we could incorporate into the presentation (thanks to Paul Popovich and Luis Gonzalez for also helping us generate a lot of these ideas) and at that point I think Erin came up with the name "Joker's Wild."
Fast forward a few months: occasionally I'd talk about the presentation idea with people but still wasn't any closer to actually making it real.
Then a few days before the SQL Saturday Columbus submission deadline, Erin reached out to ask if we were going to submit. We recruited Andy and Drew to help present and submitted an abstract:
Come one, come all to the greatest (and only) SQL Server variety show at SQL Saturday Columbus.
This session features a smattering of lightning talks covering a range of DBA- and developer-focused SQL Server topics, interspersed with interactive games to keep the speakers and audience on their toes.
Plan for plenty of sarcasm, laughs, and eye rolls in this thoughtfully structured yet highly improvised session.
We can't guarantee what you'll learn, but we do promise a great time!
*Slot machine will not generate real money for "winners"
If that abstract reads a little vague, it's because at that point we didn't know exactly what we wanted to do yet. Once our session was selected though it was time to come up with a concrete plan (big thank you to David Maxwell and Peter Shore for giving us the opportunity to try something like this).
After some discussion, Erin, Andy, Drew, and I came up with the following structure:
After our first meeting Andy created the world's most versatile PowerPoint presentation that would run the show. Seriously, if you haven't watched the video above yet, go watch it - that introduction is all PowerPoint goodness created by him.
I'm incredibly happy with how it all went. The session was planned but a lot of it was still left up to a highly improvised performance. I had a lot of fun preparing and presenting, and I think the session was well received by the audience. Jeopardy and Pictionary were a lot of fun too, even though I ran out of video recording space so I couldn't include them in the video.
I hope we have another opportunity to present this session again in the future.
Thank you again David and Peter for letting us do this session as part of SQL Saturday Columbus.
Thank you to our audience for taking a risk on attending a session you didn't know much about. Also for your great participation.
And thank you Erin, Andy, and Drew for helping do something fun and different.
This post is a response to this month's T-SQL Tuesday #112 prompt by Shane O'Neill. T-SQL Tuesday is a way for the SQL Server community to share ideas about different database and professional topics every month. In this month's topic Shane asks us to describe past accomplishments that help keep us going.
Before the start of each presentation I give, I'm a nervous wreck.
It's not that I don't like presenting (I do) but in the minutes before my presentation start time I'm always filled with dread . Once I start my talk and am in the flow of my content the nerves usually subside. Those first few minutes are always rough though.
Before speaking I try to calm myself by going through a few various techniques, one of which is thinking about previous successful speaking engagements.
I rarely focus on a single past speaking engagement; rather I look at all of my appearances and pick one that best helps for the current situation.
Every presentation I give has some kind of new elements associated with it; some of these might be environmental like a bigger audience or a strange room setup, but others are self-imposed like wanting to try out a new story-telling technique or an interactive audience exercise.
At this point, I usually have enough previous speaking experiences to try and rationalize away any stressful thoughts:
The great thing here is that I'm always able to find a way to rationalize some successful past experience as having been comparable or more difficult than the current scenario. Even when I only had a couple of speaking sessions under my belt, I could think back to when I successfully taught my coworkers something, or had to teach my family members how to do something technical.
I still get nervous before speaking, but at least I can also remind myself that I've survived every previous time I've done it.
I'm not sure my nervousness will ever go away, but having past successes to think back on always helps quiet those nerves just a little bit.
 This post is a response to this month's T-SQL Tuesday #101 prompt by Jens Vestergaard. T-SQL Tuesday is a way for SQL Server bloggers to share ideas about different database and professional topics every month.
This month's topic is about what essential SQL Server related tools you use on a regular basis.
SQL Server Management Studio is an excellent tool for my day to day SQL Server developing needs.
However, sometimes I need to do things besides writing queries and managing server objects. Below is a list of my three most used tools I use on a regular basis when working with SQL Server.
Watch this week's video on YouTube
Often I need to compare the bodies of two stored procedures, table definitions, etc... to find differences.
While there are some built-in tools for doing difference comparisons in Visual Studio and SSMS source control plugins, I prefer using the third-party open-source tool WinMerge:
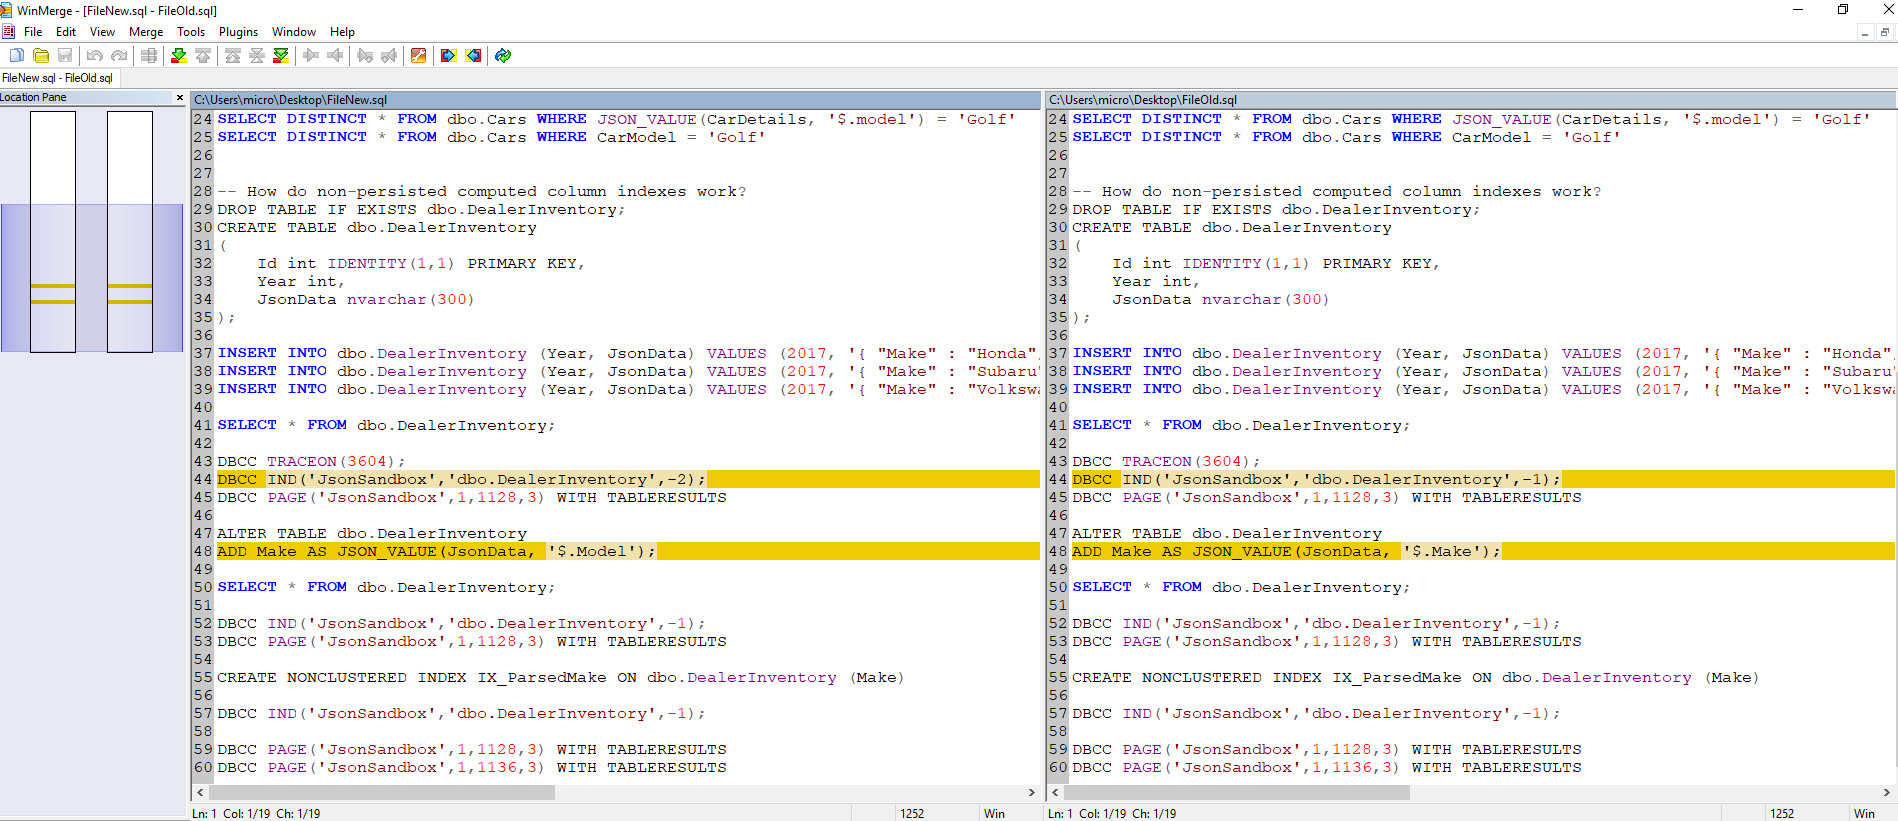
The tool is a pretty straightforward difference checking tool, highlighting lines where the data between two files is different.
It has some other merge functions available in it, but honestly I keep it simple and use it to just look for differences between two pieces of text.
When on a single display, screen real estate is at a premium. This is especially true if you are forced to use a projector that's limited to 1024x768 resolution...
OnTopReplica to the rescue! This nifty open-source tool allows you to select a window and keep it open on top of all other windows.
This is great for when I want to reference some piece of code or text on screen while working in another window:
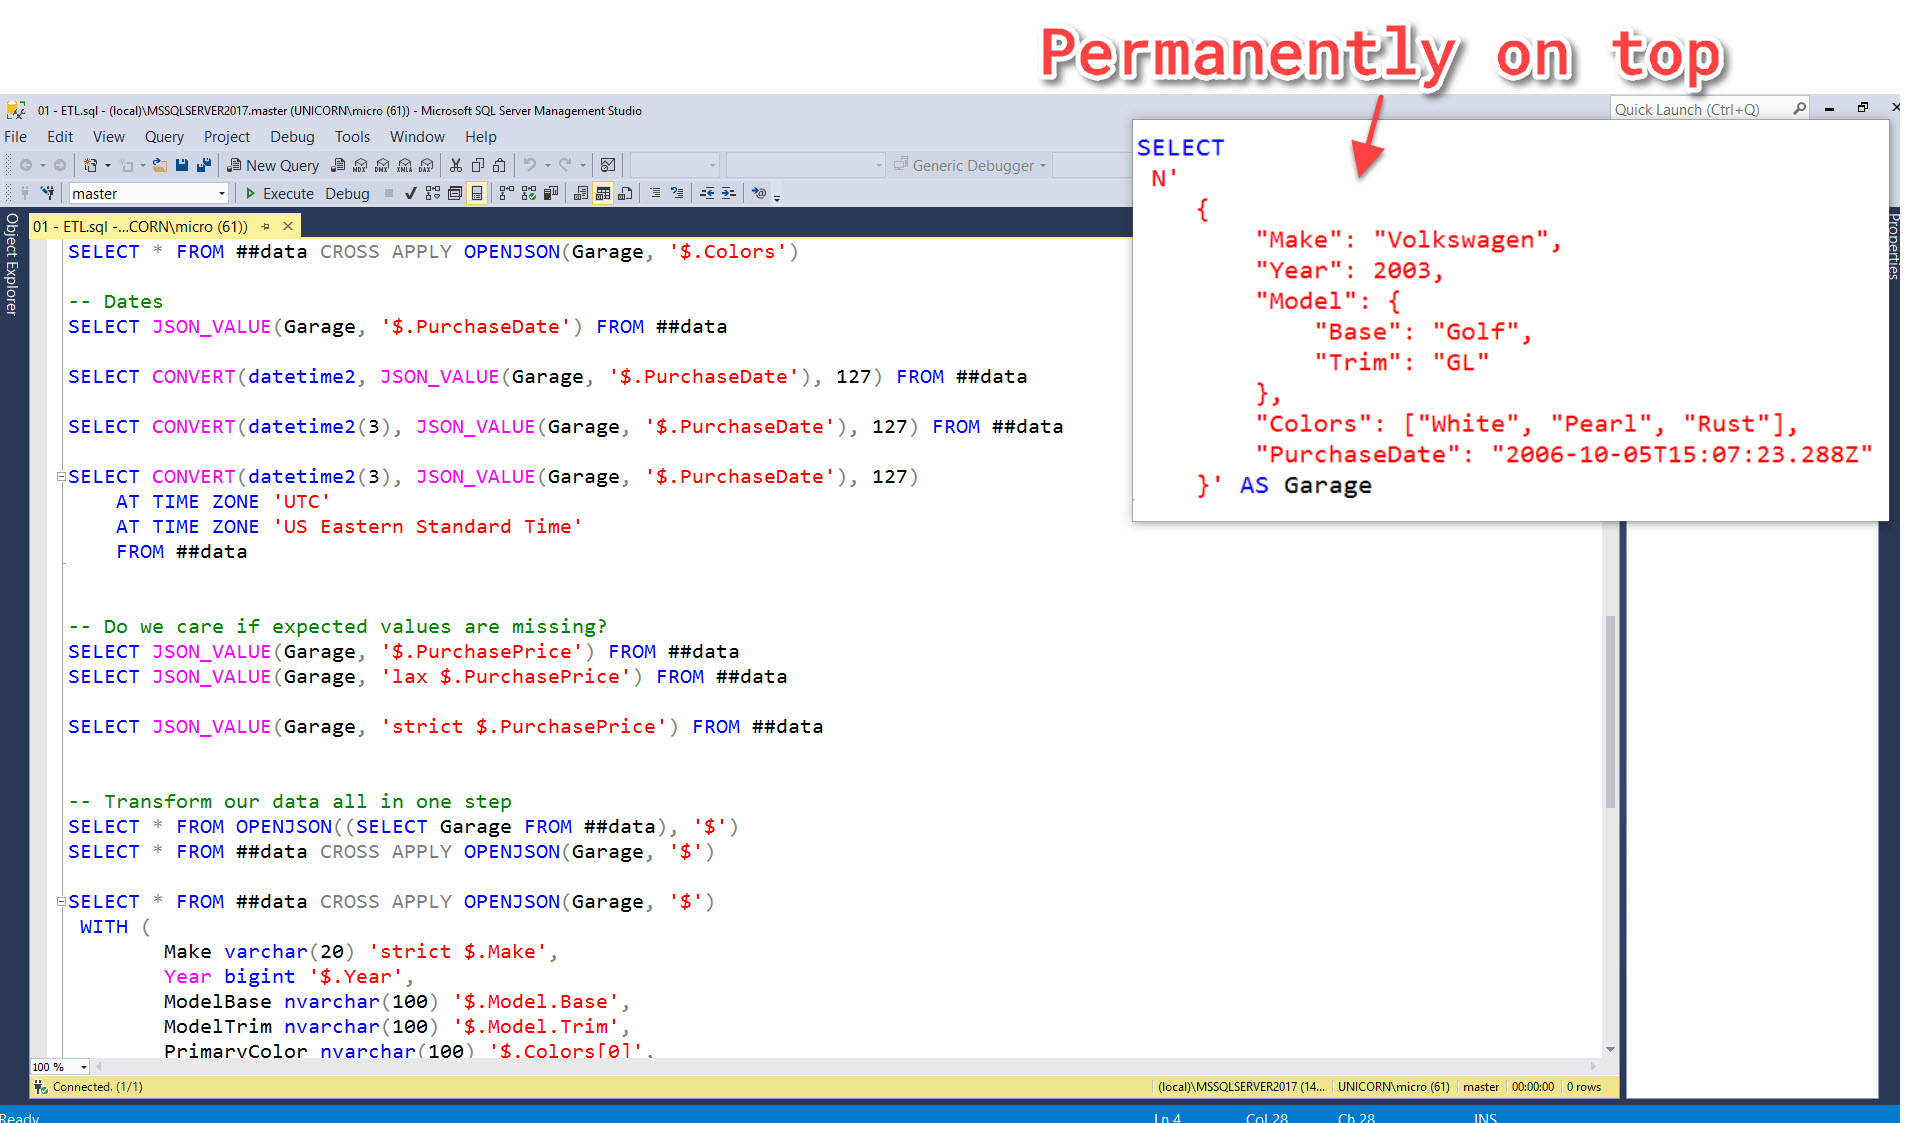
In addition to forcing a window open to stay on top, it allows you to crop and resize that window so only the relevant parts are visible.
The OnTopReplica view is live too - that means it's great to use as a magnifier on your SSMS result sets when presenting (instead of constantly having to zoom in and out with ZoomIt):
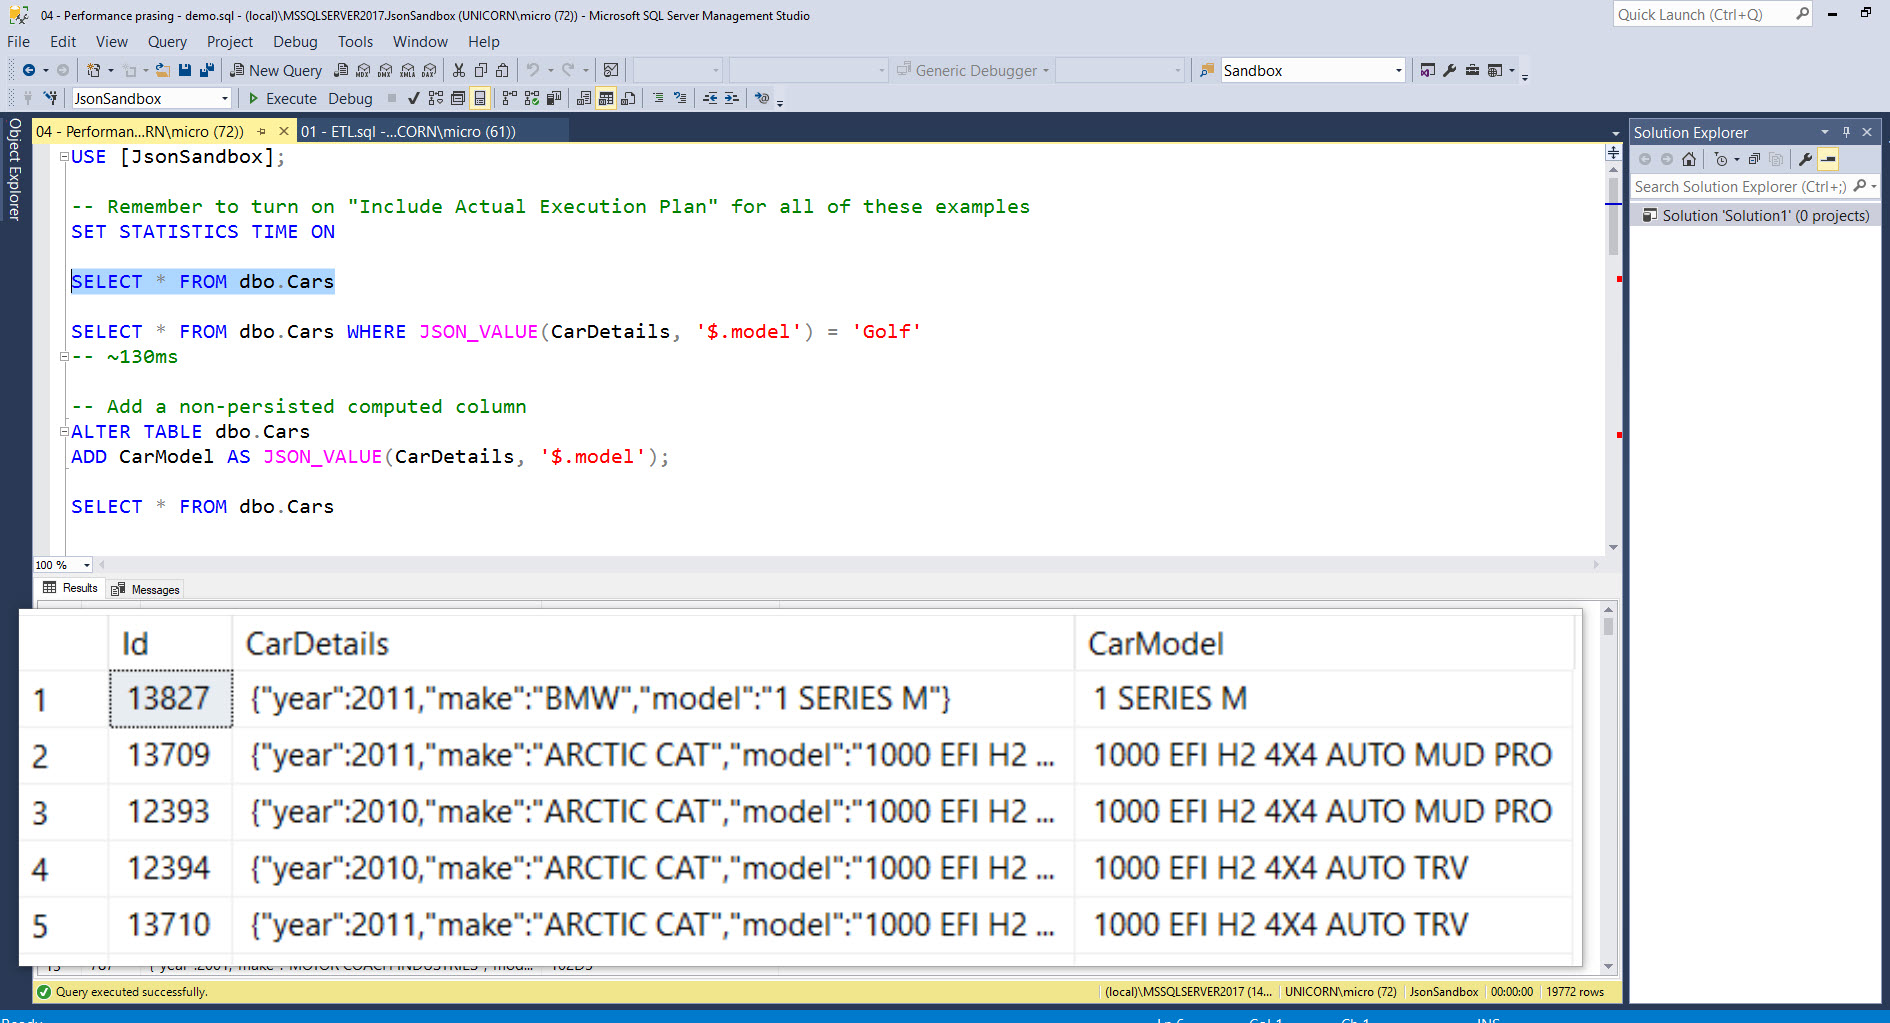 Look at those beautifully zoomed in results!
Sometimes explaining concepts with pictures is hard. For example, wouldn't that last screenshot be way better if it was animated?
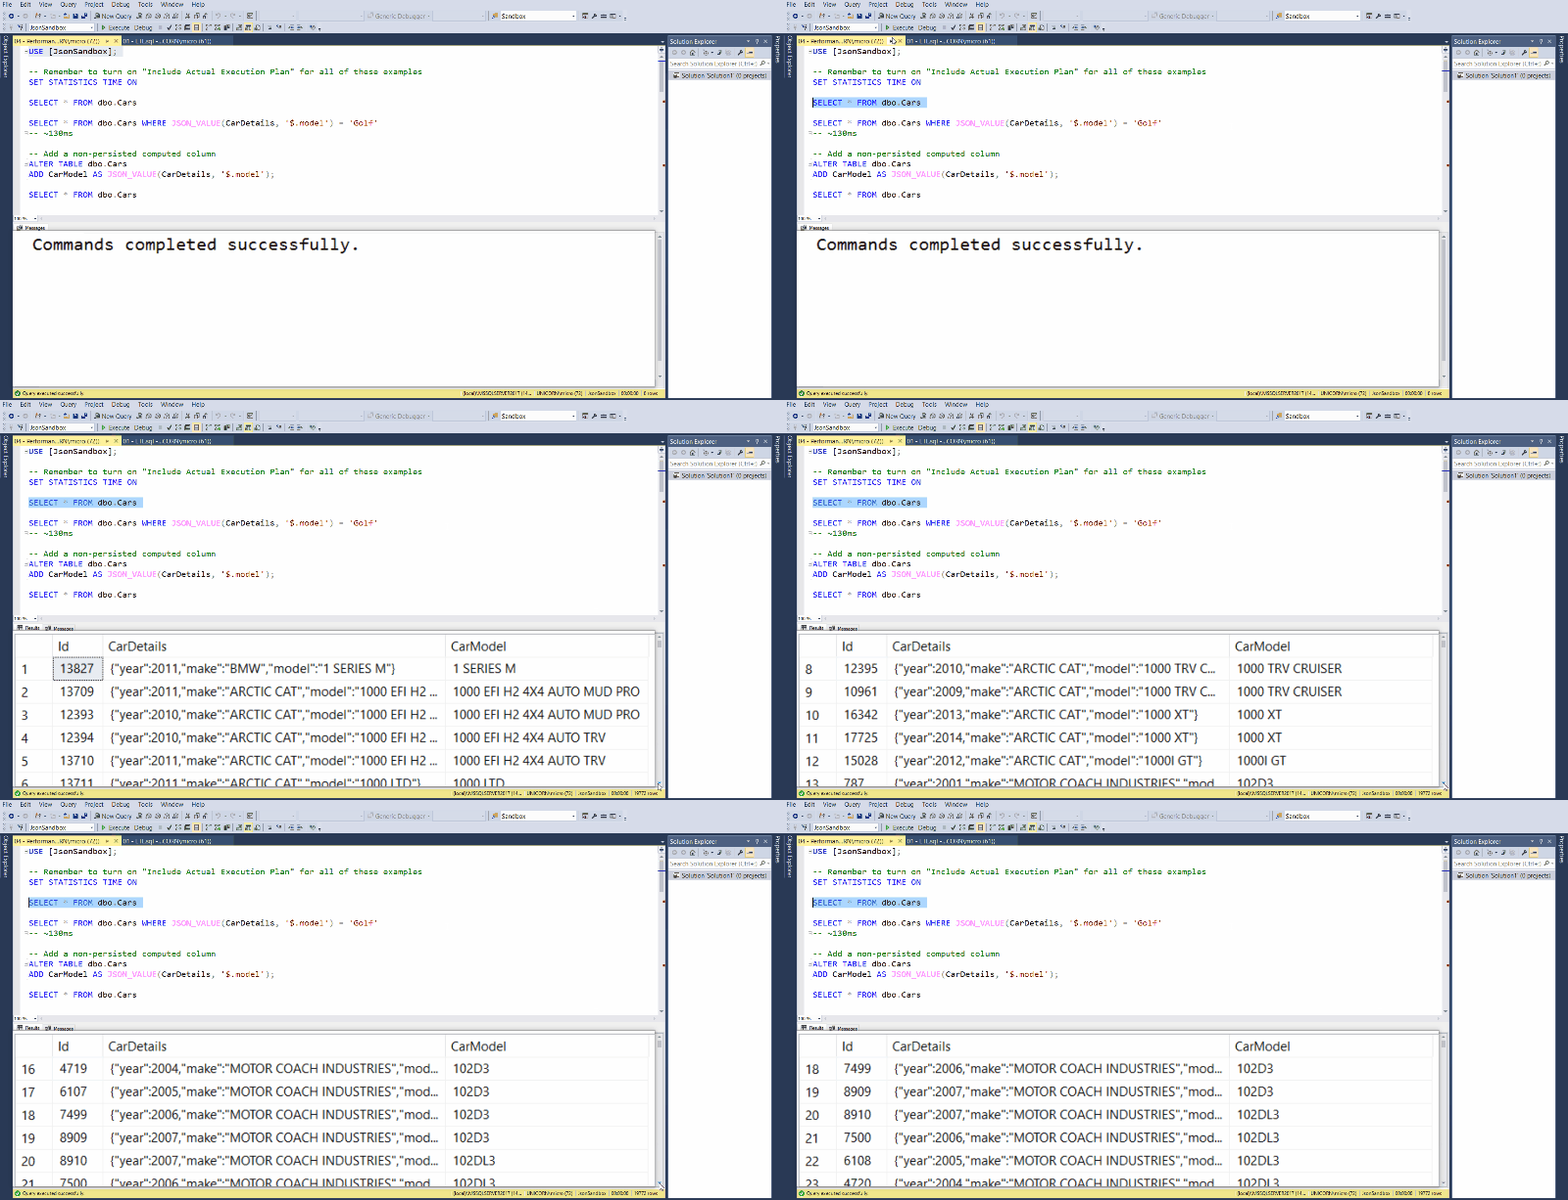
ScreenToGif is an open-source screen capture tool that does an excellent job compressing your recorded videos into gif animations. It also allows editing individual frames, allowing the addition of text, graphics, and keyboard shortcuts.